There was three inspirations for this project
· Femi Owolade supported by Nic Hughes ran a session at Mozilla Festival 2016 using the Crumble’s to make a wheeled robot.
Kit
· Kinder Egg (without the Chocolate and toy)
· Crumble
· Tape (lots of)
. Sticky-tack of some form.
. Sticky-tack of some form.
· Pens
· Paper
· Scissors
· Glue and Gluegun (optional)
Stage 1: Fix the vibrating motor into the Egg.
Stick (sticky-tack is a good temporary method) the vibrating motor into the Egg with the motor electrical connections sticking out the bottom larger half of the egg. Make sure the unbalanced load is free to move – this is bit that causes the vibrations needed to move the egg.

Stage 2: Sticking the pens on.
This is the trickiest bit. Tape the pens on the egg. One suggestion that someone who tried it out suggested, was to use little bits of sticky-tack to position the pens on the egg before tapping the pens onto the egg.
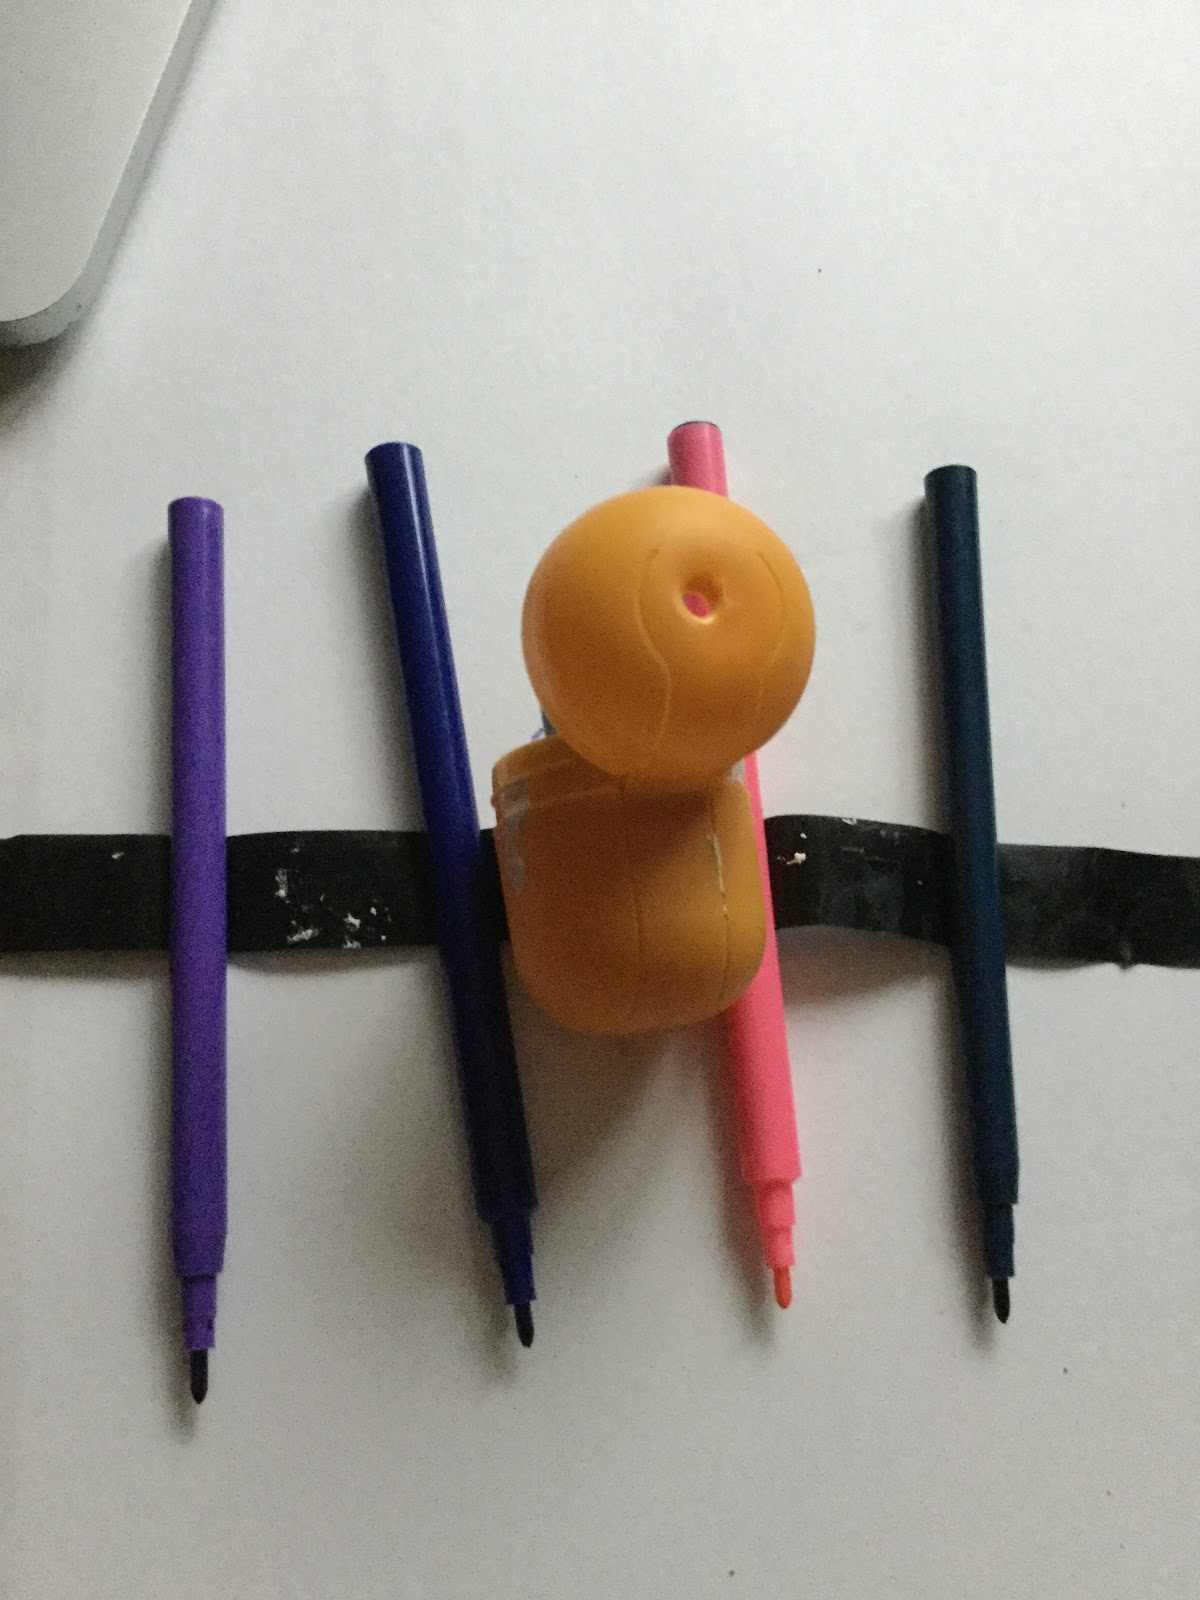
If you are using three pens, the third pen should be placed so that all three form a triangle with equal sides, that means the egg can stand-up on a piece of paper on the pen nibs, without anything supporting it.
If you are using four pens, the other two pens should be placed so that all four form a square with equal sides, that means the egg can stand-up on a piece of paper on the pen nibs, without anything supporting it.
Stage 3: Add the battery pack and go.
Using two wires connecting the battery, to the motors. Remove the nibs and set the bot off. It is hopefully vibrating and shaking and scribbling lines on the paper.

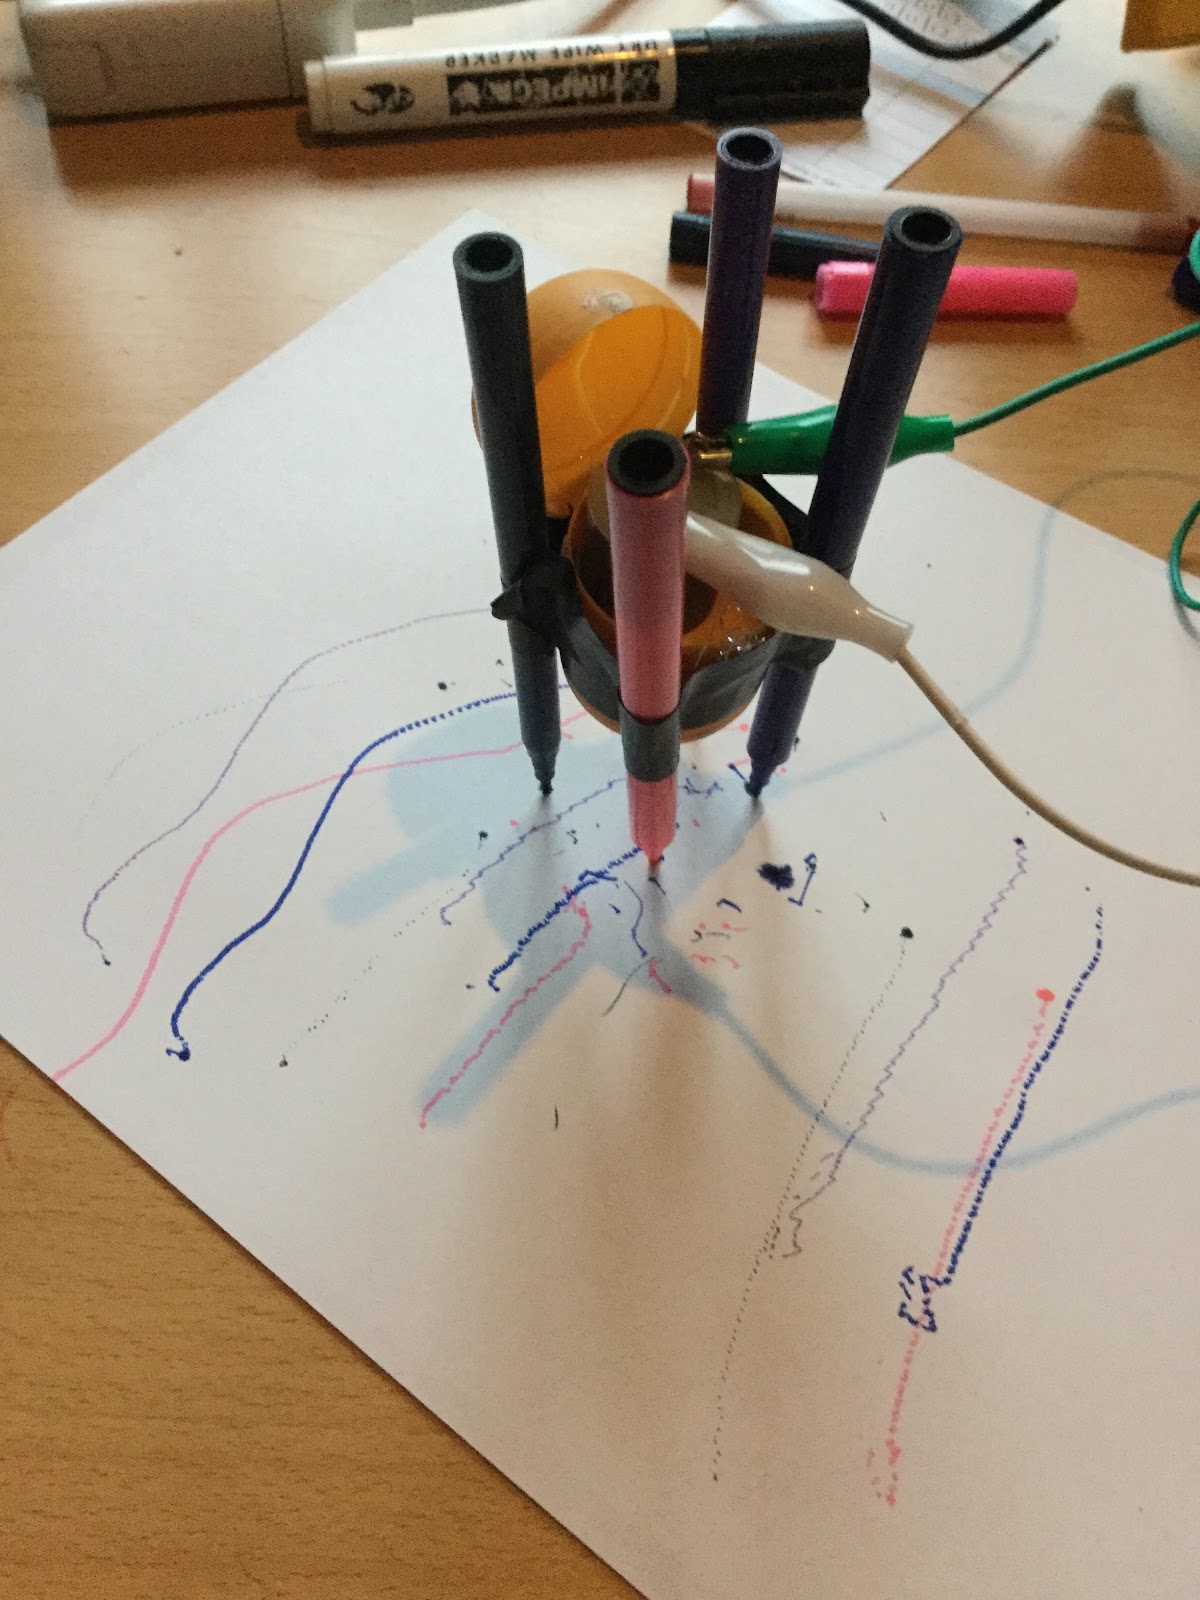
To see one in action go to: https://www.youtube.com/watch?v=NRlntdmdQRo
Stage 4: Crumble Controlling
Disconnect the battery connection (the connections on the motor can stay as they are) from the junkbot. Connect the USB cable to the Crumble. To the right of the USB connect there are two connections marked + and -. Connect one wire to the + connection and the other end to the red wire of the battery pack. Connect a one wire to the – connection and the other end to the black wire of the battery pack.

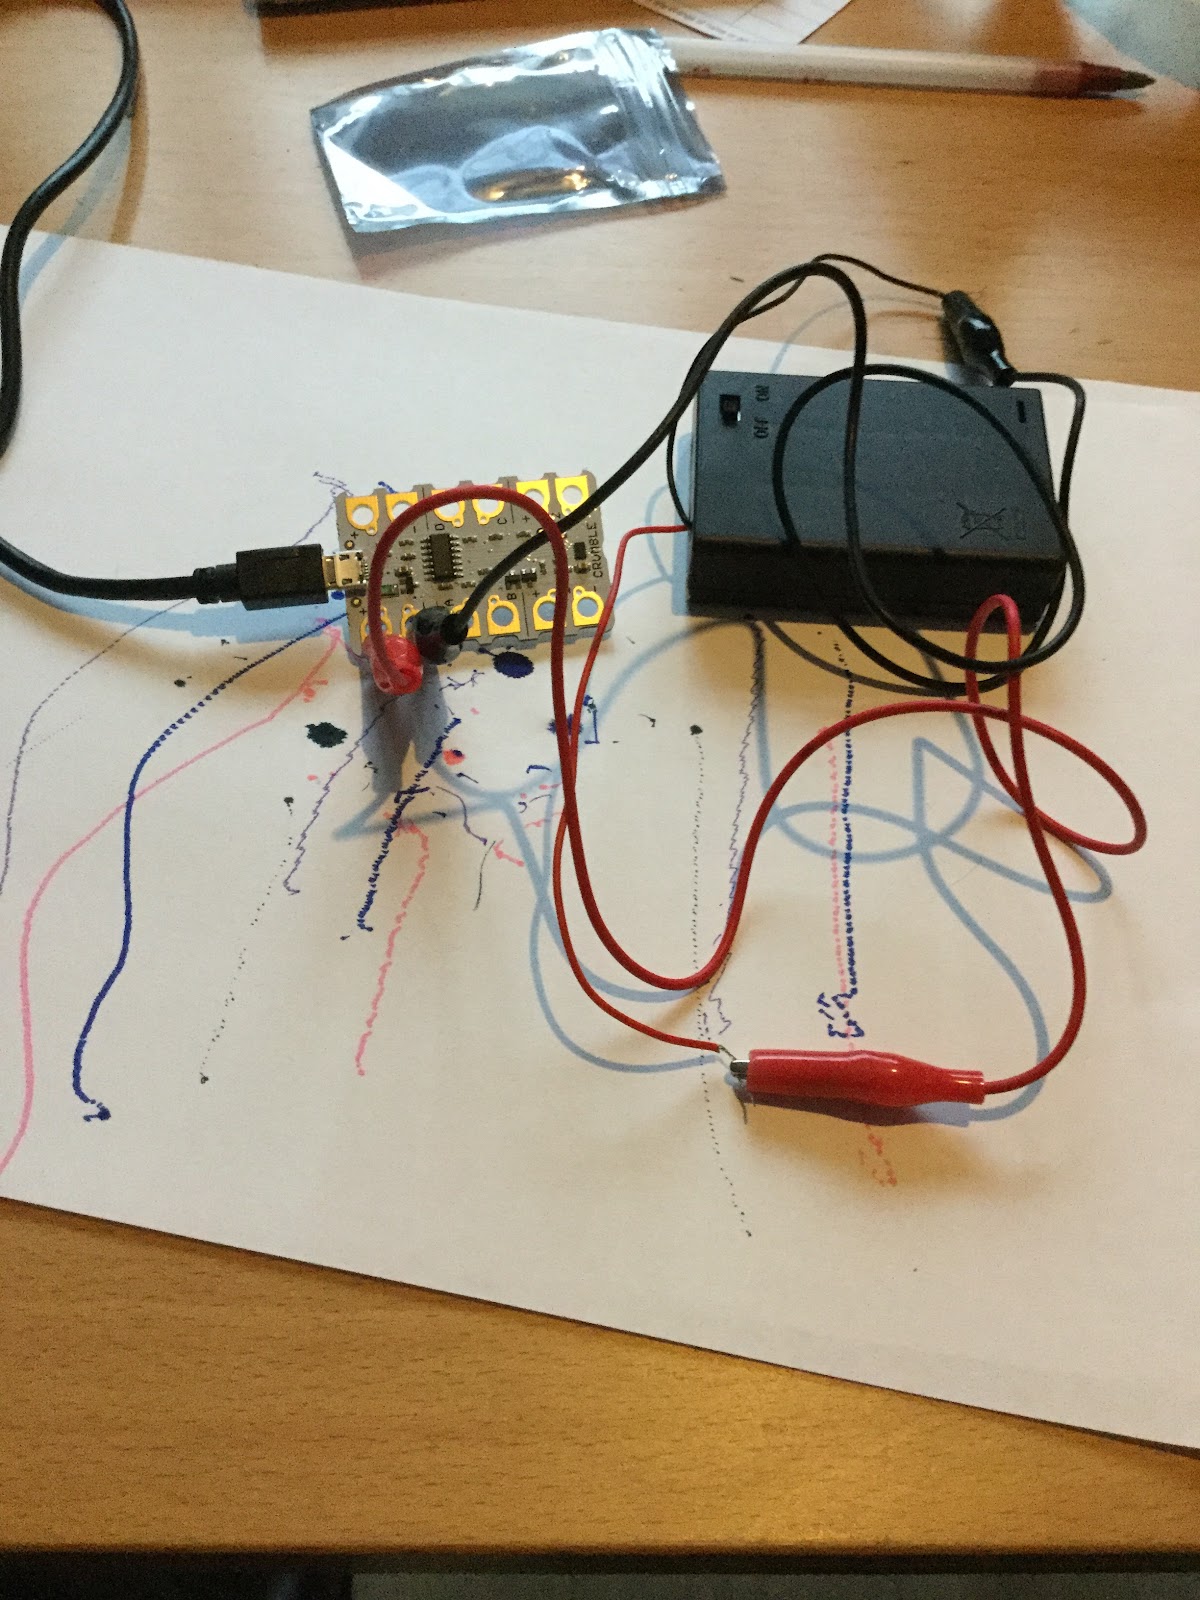
Stage 5: Connect the Egg!
On the Crumble, on the right-side there are two motor connections connect the Motor to these connections. Don’t worry about which of the motors wires is need you swap them around later.

Stage 6: Programming it – Making the bot moves.
The software can be found at https://redfernelectronics.co.uk/crumble-software/ it includes how to set it up on your own machine.
Start the Crumble software. Drag from the left the Program start, motor, and wait blocks. Now join the up start block at the top and the motor block next and the wait block last.

Your code should look like this.
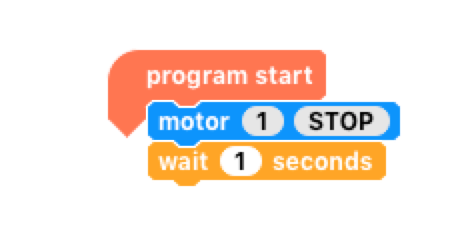
Click on the stop within the motor block. It should change to forward. Now you are ready to make it move. Press the green arrow and with the battery pack on, it should (hopefully) keep moving.

If you put a second motor block after the wait block with the stop in the block. It such then stop after 1 second of moving.
Stage 7: Making it do more.
- Drag a do-until block in (found in the control menu).
- Go to variable menu and add a new variable, I have used t, select the block marked let=, and drag a t into the blank space.
- Drag an increase block onto the screen and drag a t into the blank space.

Go to the operator menu and drag onto the screen an = block, go back to variables menu and drag a t into the first space on the = block and click on the second space on the block and type in 5.
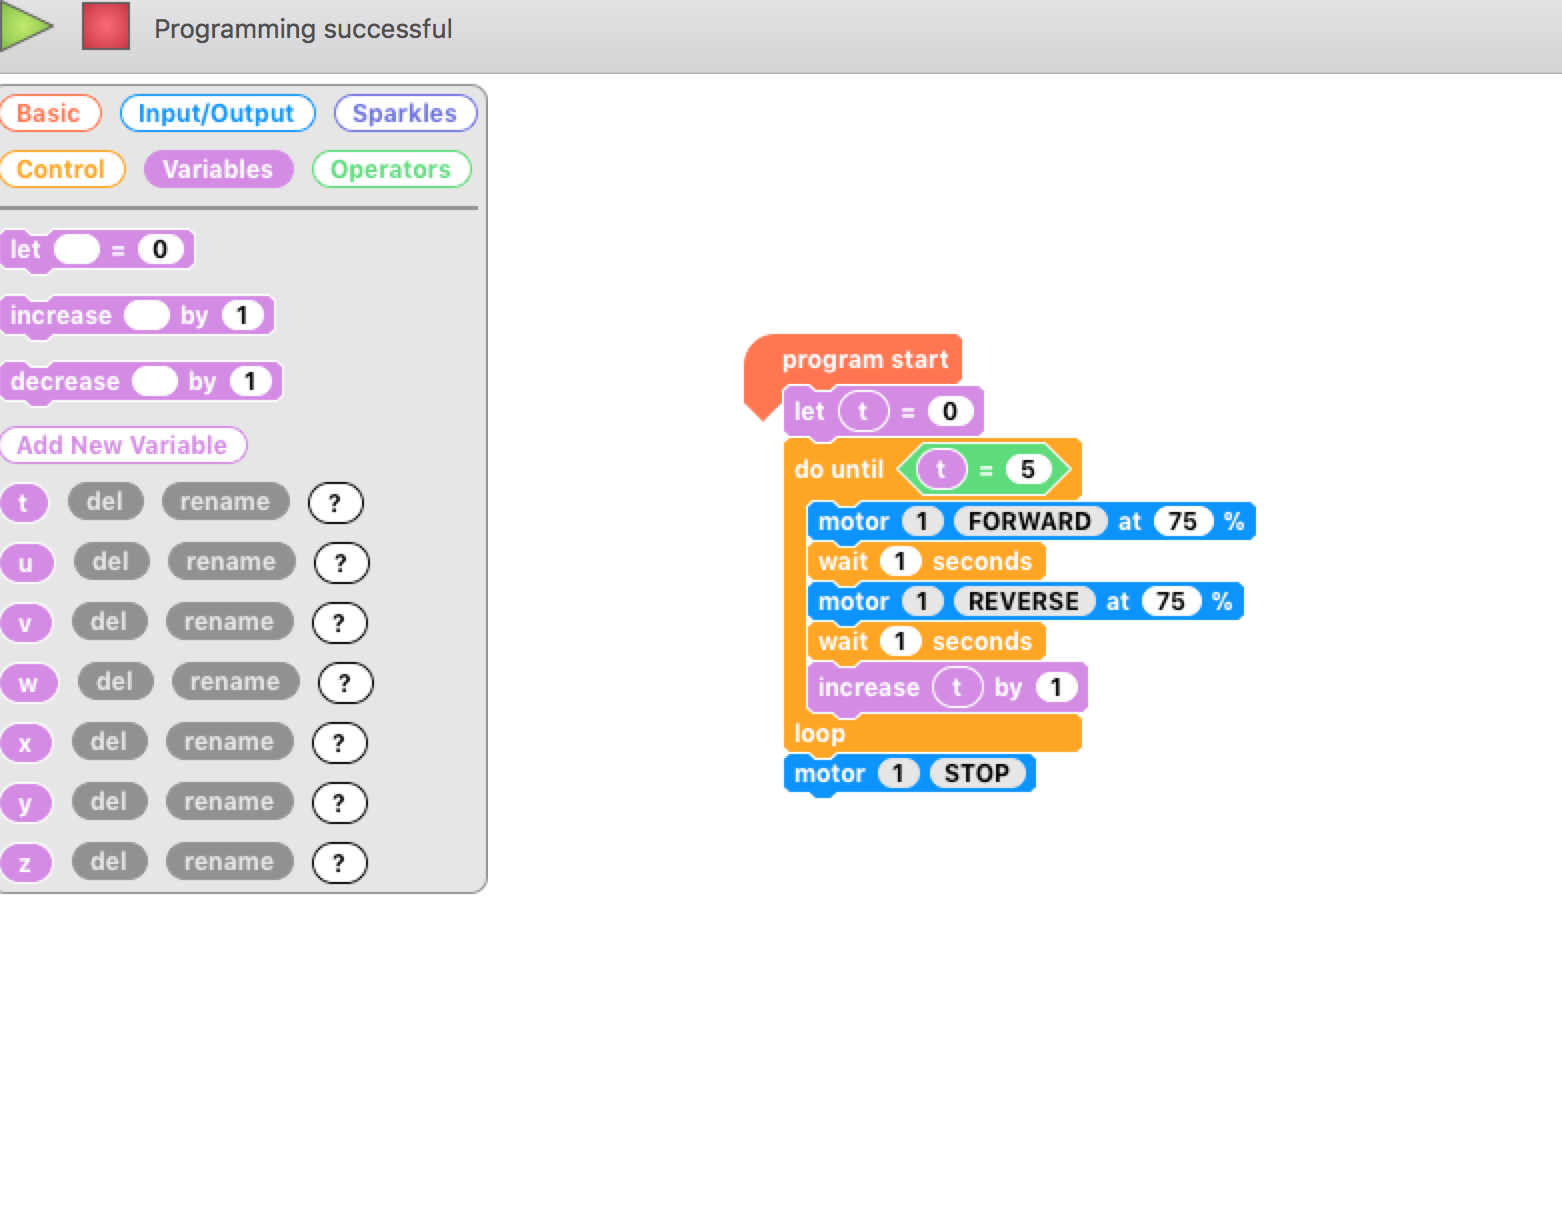
Now for the challenge put all these together to copy what is shown below. Now, but the egg-bot on the paper, with the pen lids off, press the green triangle and the motors should be spun in different directions.
This is a junkbot so it may just cause the bot to move a slightly different directions but hopefully it should just draw some squiggly lines.
© Scott Turner
Attribution-ShareAlike
CC BY-SA
All opinions in this blog are the Author's and should not in any way be seen as reflecting the views of any organisation the Author has any association with. Twitter @scottturneruon
Very informative!!!!
ReplyDeleterobot kit
This comment has been removed by a blog administrator.
ReplyDelete