Showing posts with label robot. Show all posts

Wednesday 7 September 2016

DIMM 'the OOD' Cardboard Robot

CBiS Education generously sent me two of their new range of robotics development kits - BinaryBots  (https://www.binarybots.co.uk/makers.aspx), these are a range of cardboard based kits (so far a robot and a UFO) with electronic components for example LEDs; sensors and buzzers,  depending on the kits. What makes the kits interesting though is they are designed to be controlled by either by a BBC Micro:bit or a CodeBug.In an earlier post,  I played with the UFO one (http://robotsandphysicalcomputing.blogspot.co.uk/2016/08/ufo-detects-light.html), now I have had a chance to play the DIMM the robot.

With the wires hanging out of the mouth and its humanoid shape it reminds we a bit of the OOD from Doctor Who (https://en.wikipedia.org/wiki/Ood) but a lot more unthreatening.


How to build it video from @cbiseducation is shown below.


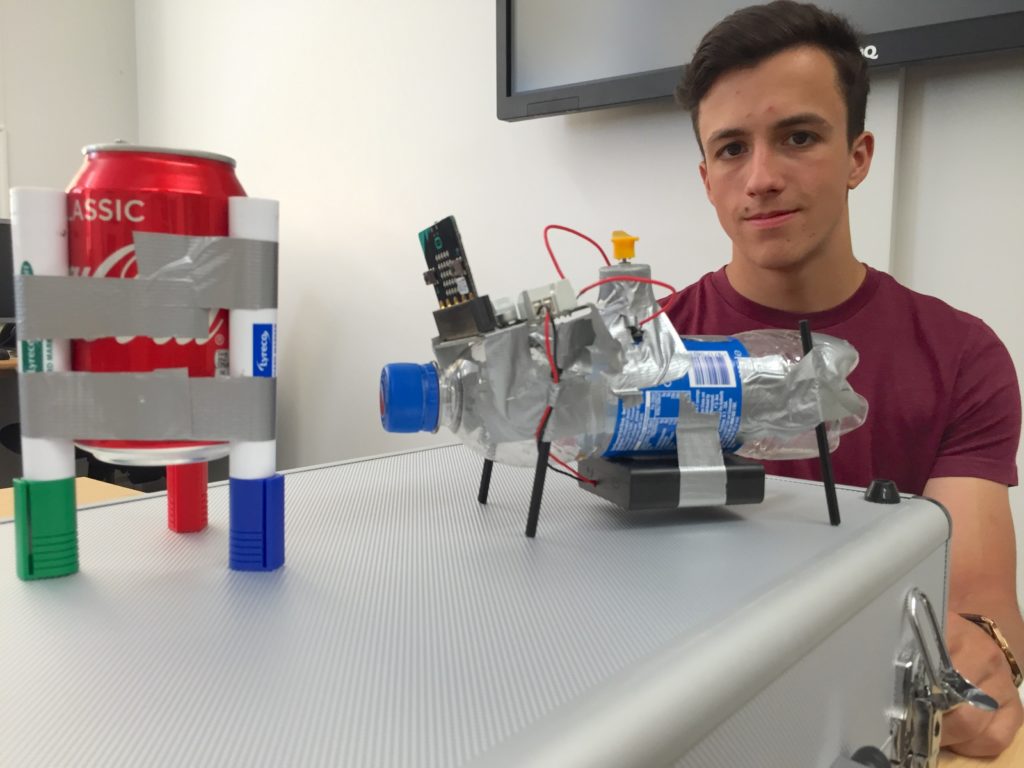
So I built a Light detection system with the light sensor that came with the kit and added a microbit. The idea was
- to play one sound when the light level is low as well display an 'L' on the Microbit;
- to play another sound when the light level is higher and display an 'H' on the Microbit.

The code used is shown below. It is built around the forever loop, the light sensor is connected to Pin 1 and the speaker on Pin 0 (ground and Vcc connected as appropriate see the robot below). when the sensor value is greater than 175 then the low light level is detected otherwise the higher light is detected.


The video below shows this enjoyable kit in action - the sound level is a bit low in the video.


All opinions in this blog are the Author's and should not in any way be seen as reflecting the views of any organisation the Author has any association with.

Friday 2 September 2016

Matthew takes control of robot research project

Taken from: http://www.northampton.ac.uk/news/matthew-takes-control-of-robot-research-project/


Matthew Hole
A sixth-form student has spent the summer at the University of Northampton investigating the possibility of controlling DIY robots with a computer half the size of a credit card.
Matthew Hole, who attends Wrenn Academy in Wellingborough, has been awarded a Nuffield Research Placement – a scheme which offers sixth formers the chance to work on university research projects during the summer.
During his time at the University, Matthew used a BBC micro:bit computer  to control a junkbot – a robot made from junk, such as a drinks can, powered by a kit.
Junkbots have previously been controlled by a Raspberry Pi computer, but the University’s Associate Professor in Computing and Immersive Technologies, Dr Scott Turner, saw the potential to harness the micro:bit.
“The micro:bit has been given away free to every Year 7 pupil in the UK, so it made sense to investigate how well it could control a junkbot.
“Matthew worked incredibly hard on the research project, overcoming several problems, and was successful in harnessing the micro:bit to control a junkbot.
“He used his experience to produce an action pack, which will be available for schools to refer to so that pupils can learn how to control a junkbot with the micro:bit – so Matthew’s research has the potential to benefit thousands of young people across the UK and beyond.”
Matthew said: “The project has definitely helped me to develop my problem solving skills: I’ve learnt how to break projects down into small pieces and work on them methodically, which has been really useful,” said Matthew, who has received a bursary to carry out his work.
“To be able to work on an action pack that will be available for schools to use is also a fantastic thing to have on my CV.”

To learn more about the junkbots project contact: scott.turner@northampton.ac.uk or go to http://robotsandphysicalcomputing.blogspot.co.uk/2016/08/creating-microbit-junkbot-for-use-in.html


All opinions in this blog are the Author's and should not in any way be seen as reflecting the views of any organisation the Author has any association with.

Friday 24 June 2016

Playing with Smurf the Robot

Experimenting with an Aldebaran NAO robot - nicknamed Smurf - to get the robot to deliver a short welcome. The video below show the robot being simulated using the code in figure 1 and then shows the 'Smurf' actually carrying out the routine (the bottom video show this bit without the simulator). The only difference in the code on the simulator and the one running on the actual robot was an extra command was added at the start of the one on the robot to only start when the top of the head is tapped.


figure 1. Choregraphe program for the routine.


All opinions in this blog are the Author's and should not in any way be seen as reflecting the views of any organisation the Author has any association with.

Wednesday 8 June 2016

Teachmeet and robots via tweets


If you'd like to find out more about Computing at the University of Northampton go to: www.computing.northampton.ac.uk. All views and opinions are the author's and do not necessarily reflected those of any organisation they are associated withAll opinions in this blog are the Author's and should not in any way be seen as reflecting the views of any organisation the Author has any association with.

Monday 16 May 2016

First Try with 7bot Robot Arm

In a previous post (http://robotsandphysicalcomputing.blogspot.co.uk/2016/05/playing-7bot-robot-arm.html) I discussed starting to set up the 7bot robot arm (https://www.kickstarter.com/projects/1128055363/7bot-a-powerful-desktop-robot-arm-for-future-inven) . I have still to set up the gripper.

This post document my first tentative steps with playing with it. The code below was used to try and get my head around the positioning of the arm - which servo does what (a good guide for this has been provide by the company online) and what the changing angle on the servos actual does. Essentially the code puts the arm in a starting position and varies the angles from there in usually in 15 or 30 degree increments over seven positions.

#include <Servo.h>
#include <DueFlashStorage.h>
#include <Arm7Bot.h>
Arm7Bot Arm;
void setup() {
  // initial 7Bot Arm
  Arm.initialMove();
}

void loop() {
  // set motor[0] speed to 100
  Arm.maxSpeed[0] = 30;
    double angles_0[SERVO_NUM] =  {0, 100, 90, 0, 90, 90, 75};
  Arm.move(angles_0);
  // Move to pose 1
  double angles_1[SERVO_NUM] =  {0, 100, 0, 0, 90, 90, 75};
  Arm.move(angles_1);
  // Move to pose 2
  double angles_2[SERVO_NUM] =  {30, 110, 15, 0, 90, 90, 75};
  Arm.move(angles_2);
  // Move to pose 3
  double angles_3[SERVO_NUM] =  {60, 120, 30, 0, 90, 90, 75};
  Arm.move(angles_3);
  // Move to pose 4
  double angles_4[SERVO_NUM] =  {90, 130, 45, 0, 90, 90, 75};
  Arm.move(angles_4);
   // Move to pose 5
  double angles_5[SERVO_NUM] =  {120, 140, 60, 0, 90, 90, 75};
  Arm.move(angles_5);
  // Move to pose 6
  double angles_6[SERVO_NUM] =  {150, 150, 75, 0, 90, 90, 75};
  Arm.move(angles_6);
  
}   

Video below shows the routine in action.


All opinions in this blog are the Author's and should not in any way be seen as reflecting the views of any organisation the Author has any association with.

Thursday 31 March 2016

mBot - cute, fun and Arduino based

I have had an opportunity (ie, the time) to play with mBot, Scratch Programmable Robot using the mBlock software which appears to be a modified version of Scratch - so relatively easy to use. They have added a section of blocks, to the standard set, marked Robots containing blocks for both Arduino and mBot. 

An earlier blog post (mbots - graphical programming and Arduino) discuss some of the basics of the robot. Just for fun I wanted to play with the ultrasonic sensor, getting the robot to react, change direction (run away) and the 'face' on an LED matrix that came with the robot if there is an object in the way.


The routine
  • Loop
    • Show a smiley face (using Port 4 )
    • If the ultrasonic detector senses something close (guessed at a setting of 10)
      • Go backwards quickly
      • Play a tone
      • Show an upside-down smiley face 
      • wait 1 sec
    • Otherwise
      • Move forward
  • End the loop


Download the code to the mBot using the Upload to Arduino button (see below). Here is where you find out whether you have set the system up correctly. In the mBlock editor pull down menu choose Connect and select the required connection; I have been using a USB cable so I needed to select the serial option and select the USB hub. After that using the Upload to Arduino button did lead to the code downloading.


The video below shows it in action


This is good fun, and a very cute. The build quality of the bots (not my building ability) the metallic construction means the bots feel substantial.  The software as it is Scratch based I think it will be interesting to try it out with my Code Clubbers - especially as they have been asking to play with more robots.

As always I would be interested to hear from others on their experiences of using this little robot.

Related links
mbots - graphical programming and Arduino


All opinions in this blog are the Author's and should not in any way be seen as reflecting the views of any organisation the Author has any association with.

Saturday 19 March 2016

Ramblings about Social Robotics in Schools

Sometimes what I do as job can have some major personal pluses (I get to play with robots some of the time), one of these has been the opportunity to introduce people to social robots, and recently I have been lucky enough to managed to do this four times-  twice to my own computing students, but also to groups of primary school children in two events (see below). 

Apart from it's what I enjoyed doing; the social robots we are starting to see are great, but there is so much more that could be done. Who is going to develop this - possibly one of these children? Why not? It has taken nearly 40 years to get from R2D2 on the screen to some of the social robots we are seeing launched now, in another 40 years we might have something as bright as R2D2 (R2D2 was always brighter than C3PO). Why wouldn't one or more of these bright children or one of the students I teach, be the ones to contribute to this? They have the enthusiasm, with the changes in the National Curriculum in the UK they are developing some of the skills and asking the questions. Look at the work that work being done by Pi Foundation, the CamJam EduKit 3 robot kit (http://camjam.me/?page_id=1035) and especially products such as the OhBot (see bottom of the post for details of this robot) as just as a few examples of how this is being developed.


Event 1.

In an in-reach STEAM activity day I have had the opportunity to show off two NAO robots in action to a group of 8-years olds. As well presenting a short presentation on social robots (see below). By the way Red and Smurf are the nicknames for the two robots.


Event 2. 

A talk on Social Robotics (with a little help from a Red friend) to an audience of primary school children as part of Lab_13's Lectures at Wollaston School, Northamptonshire. 

Red performed, walking with three of the children and the presentation included discussion about the robots JIBO and Buddy that are expected this year. 


Changes need to the presentation

A change I would like to make is to bring along an OhBot (a bit like the one in the video below) as well as including OhBot in the revised presentation slides.


All opinions in this blog are the Author's and should not in any way be seen as reflecting the views of any organisation the Author has any association with.

Thursday 3 March 2016

NAO, chatbots, teaching and just plain showing off

I  managed to do something I have want to do for a long time, show off social robots; (now I have three goes at it) thanks to the recent purchase of NAO robots by the University of Northampton. 

Session 1
In an in-reach STEAM activity day I have had the opportunity to show the robots in action to a group of 8 years olds. As well presenting a short presentation on social robots.


I would be interested to hear how others are using NAOs via comments.


Session 2 and 3
I have managed to include a physical example of Social Robots into my teaching. The aim of the session was to teach about social AI, revolving around the using social cues, to a certain extent, using natural language through chatbots, for us to communicate with machines.

The robots were used as an example of a social robot,  the way we want to play with or work with them, without having to going through a steep learning curve on how to use them. Students were encouraged to consider why this was and that anthropomorphisation plays a part (NAO basically has some of the characteristics of a small child). The fact that it responds to voice commands, its looks, has a childlike voice, that it always moving (even slightly when standing) and the way it moves; were spotted by the group as ways it attracts us to it - it is really hard not to talk to it like a child sometimes (but perhaps that is just me).


This session also included the use of chatbots (one example, ALICE used is shown here) and AIML, Artificial Intelligence Markup Language, (a link to more about AIML is included below). Just as a bit of background, chatbots (also called variously, chatterbots, conversational agents, etc) are programs that hold a conversation with us using through either text or speech. The chatbots were used to show how we can create intelligent-like behave by in effect providing responses to questions. Followed by, how we then take this further by using the responses people give, while using the chatbot, to 'fine-tune' the model.


To read more about NAO robots go to https://www.aldebaran.com/en
To read more on AIML go to http://www.alicebot.org/aiml.html

Example chatbots

If you would like to create your own chatbot personally I think one of the easiest ways to start is through https://playground.pandorabots.com/en/quickstart/


All opinions in this blog are the Author's and should not in any way be seen as reflecting the views of any organisation the Author has any association with.

Saturday 26 December 2015

BB-8, Droid I was looking for... - Tynkering

In a recent post controlling the Sphero BB-8 with the Tickle App was discussed.

This is not the only alternative software, the Tynker App can also control it.


This is also a graphical drag and drop programming tool, that you can connect certain 'toys' to. Though the App itself is about developing programming skills.


The Sphero BB-8 Droid can be connected to Tynker (or how I did it anyway) by:

      • Clicking on the Create button on the opening screen;
      • Clicking on Blank Template;
      • Deleting the 'Actor' that has there and clicking on the + button in the top right hand corner of the screen;
      • Clicking on connected toys and selecting the grey ball;
      • On the main screen it should say spherobot with a code button at the side, click on the button;
      • You should get a screen with some code for changing the colour shown and then moving in a square- you can change this for your own code.
Not all the commands, listed down the side, will work with the BB-8 - I restricted myself to the ones under common (star in the list).

The Tynker app is a nice tool anyway with lots of games related activities to try. Having the ability to connect and program certain devices is a benefit.


If you have comments or experiences with Tynker, Sphero BB-8 or Tickle app please add them.


All opinions in this blog are the Author's and should not in any way be seen as reflecting the views of any organisation the Author has any association with.

Friday 25 December 2015

BB-8, this is the Droid I was looking for...


Previously I have shown the Sphero BB-8 rolling around the room under its own control

One of the features of the Sphero BB-8 Droid  is it programmable either by its own downloadable software but also by one of my favourite apps - TickleApp which has been discussed in previous posts. This app allows control of a quite an impressive range of devices using the same interface. Examples, some of which have been discussed previously (e.g Parrot Minidrone or Dash and Dot), are shown below. 


The App uses an graphical programming interface similar to Scratch or Blockly to produce code. The example here it a very simple one of:

  • Spin twice for one second;
  • Move roughly in a square;
  • If the BB-8 collides (or is bumped) it is set to spin twice for a second.  

Ok, not the most sophisticated bit of coding; but it does demonstrates the simplicity of controlling this robot with the app. 

Sphero BB-8 Droid is great fun, and with the head appearing to float over the body and face in the direction of movement it is hard resist. The video below shows it action.


 All opinions in this blog are the Author's and should not in any way be seen as reflecting the views of any organisation the Author has any association with.

Tuesday 1 December 2015

Controlling junk with LEGO

Up to this point the junk bot building has largely being about building a moving (or drawing) 'bot' moved by vibration - limited control, but fun. A Nuffield funded bursary student, Hayden Tetley,  has being working within staff from the University of Northampton on whether LEGO 8547: Mindstorms NXT 2.0: Robot or Raspberry Pi based solutions can be incorporated with the bot to add some control of the movement (still by vibration).


Idea One 

Is to add a LEGO NXT brick, to move a junkbot similar.The motor and broken propeller combination in the earlier junkbots is replaced with the NXT brick and LEGO motor. A good potential feature is it a self-contained unit with power and control together, as well as being potentially fairly simple to set-up. This is the focus of this post. 

Here are some videos showing idea one in action using LEGO motors, brick and the software that comes with the LEGO 8547: Mindstorms NXT 2.0: Robot :


For more information on how this was done go to: http://legojunkbots.weebly.com/uploads/3/7/2/2/37227791/nuffield_nxt_mindstorms.docx or http://legojunkbots.weebly.com/

Idea Two

Is to do a similar approach as idea one but keep the motor and broken propeller combination but control the motors via a Raspberry Pi. This is discussed in another post http://robotsandphysicalcomputing.blogspot.co.uk/2015/07/raspberry-pi-controlled-robot-from-junk.html

Details of the work will be published on the Junkbots Blog (htttp://junkbots.blogspot.co.uk/ ) as the project progresses.


All opinions in this blog are the Author's and should not in any way be seen as reflecting the views of any organisation the Author has any association with.

Wednesday 18 November 2015

Impact of research

A recently released kickstarter project website http://www.robotixedu.com/phiro.aspx has quoted research from the University of Northampton. This is an interesting product designed to teach children programming . In essence programming robots is good way to develop problem-solving skills.


The publication mentioned can be found at


  • Robots in problem-solving and programming (Scott J Turner, Gary Hill), In Proceedings of 8th Annual Conference of the Subject Centre for Information and Computer Sciences, Higher Education Academy Information and Computer Sciences Centre, Ulster, pp. 82--85, 2007. [paper]

  • With example related paper :

      • Problems first second and third (Gary Hill, Scott J Turner), In International Journal of Quality Assurance in Engineering and Technology Education (IJQAETE), volume 3, pp. 88--109, 2014. [paper]
      • Robotics within the teaching of problem-solving (Scott J Turner, Gary Hill), In ITALICS, volume 7, pp. 108--119, 2008.[paper]

    To read more about the research by the team in the area of robots for developing problem-solving skills go to:

    http://compuationalthinking.blogspot.co.uk/2015/03/problem-solving-publications.html


    If you'd like to find out more about Computing at the University of Northampton go to: www.computing.northampton.ac.uk. All views and opinions are the author's and do not necessarily reflected those of any organisation they are associated with or endorse the product.


    All opinions in this blog are the Author's and should not in any way be seen as reflecting the views of any organisation the Author has any association with.

    Sunday 15 November 2015

    Robotics within the Teaching of Problem-Solving

    Robotics within the teaching of Problem-Solving


    Volume/Issue:  Vol 7, Issue 1

    Date:Sunday, 1 June, 2008

    Journal Name: ITALICS

    Author(s)

    Scott Turner
    Gary Hill

    Abstract
    This paper considers the experiences of teaching on a module where problem-solving is taught first, then programming. The main tools for the problem-solving part, alongside two problem-solving approaches, are tasks using Mindstorm (LEGO, Denmark) robot kits. This is being done as a foundation step before the syntax of a language (Java) is taught to enable a Graphical User Interface (GUI) emulation of a previous robot problem. Results of student evaluation and feedback will be presented and the use of two simulators will be considered.

    Full paper available at: https://www.heacademy.ac.uk/robotics-within-teaching-problem-solving or PDF version https://www.heacademy.ac.uk/sites/default/files/ital.7.1h.pdf

    All opinions in this blog are the Author's and should not in any way be seen as reflecting the views of any organisation the Author has any association with.

    Sunday 25 October 2015

    It is good time to play with Social Robots

    Social robotics has a research area in Universities for a while, looking into interface with robots that are based around our social cues, or modelling social cues to understand neurodiversity such as Autism. Some great work by companies such Aldebaran Robotics (https://www.aldebaran.com/en) with their Nao and Pepper robots have raised the profile of social robotics.


    People like Cynthia Breazeal leading on this:


    What I find most exciting is these robots are now they are coming into the home.


    OhBot
    At the entry level in terms of price, and very well featured, is the OhBot (http://ohbot.weebly.com/). This is a  is a kit for a robot head with a Scratch-like interface having face-detection, some speech recognition in the current version; controlling several servos to get facial movement. It has provided hours of fun so far (see the video below). This is a great bit of kit for its price.


    Jibo
    Jibo has been developed by a company headed by Cynthia Breazeal. It is not yet released (end of 2015/beginning of 2016) but the videos make it look very interesting. A stationary robot that seems to be about providing a social interface to many of things we do.


    Buddy
    A robot soon to be released by Bullfrog Robotics (http://www.bluefrogrobotics.com/buddy-your-companion-robot/) . This is an incredible cute robot. 


    Related links
    It is a good time: 1 Introduction


    All opinions in this blog are the Author's and should not in any way be seen as reflecting the views of any organisation the Author has any association with.

    Thursday 20 August 2015

    Problems First, Second and Third DOI: 10.4018/ijqaete.2014070104

    A paper has recently been published in International Journal of Quality Assurance in Engineering and Technology Education on problem-solving and programming by two members of the Department of Computing and Immersive Technologies, University of Northampton.


    Problems First, Second and Third. 
    Gary Hill and Scott Turner
    DOI:  10.4018/ijqaete.2014070104

    Abstract
    This paper considers the need to focus initial programming education on problem-solving, prior to the teaching of programming syntax and software design methodology. The main vehicle for this approach is simple Lego based robots programmed in Java, followed by the programming of a graphical representation/simulation to develop programming skills. Problem solving is not trivial (Beaumont &amp; Fox, 2003) and is an important skill, central to computing and engineering. The paper extends the authors earlier research on problems first and problem solving (Hill &amp; Turner, 2011) to further emphasise the importance of problem-solving, problem based learning and the benefits of both physical and visual solutions. An approach will be considered, illustrated with a series of problem-solving tasks that increase in complexity at each stage and give the students practice in attempting problem-solving approaches, as well as assisting them to learn from their mistakes. Some of the problems include ambiguities or are purposely ill-defined, to enable the student to resolve these as part of the process. The benefits to students will be discussed including students' statements that this approach, using robots, provides a method to visually and physically see the outcome of a problem. In addition, students report that the method improves their satisfaction with the course. The importance of linking the problem-solving robot activity and the programming assignment, whilst maintaining the visual nature of the problem, will be discussed, together with the comparison of this work with similar work reported by other authors relating to teaching programming using robots (Williams, 2003). In addition, limitations will be discussed relating to the access to the physical robots and the alternative attempts to simulate the robots using three options of, Microsoft Robotics Studio (MSRS), Lego Mindstorms and Greenfoot simulators.


    To read a preview of the paper go to: http://www.igi-global.com/viewtitlesample.aspx?id=117560&amp;ptid=91662&amp;t=Problems%20First,%20Second%20and%20Third


    All opinions in this blog are the Author's and should not in any way be seen as reflecting the views of any organisation the Author has any association with.

    Top posts on this blog in March 2024

    The Top 10 viewed post on this blog in March 2024. Covering areas such as small robots, augmented reality, Scratch programming, robots. Micr...