figure 1
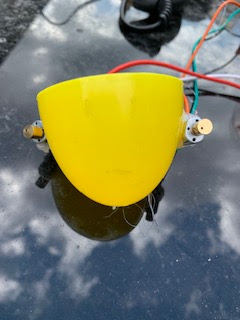
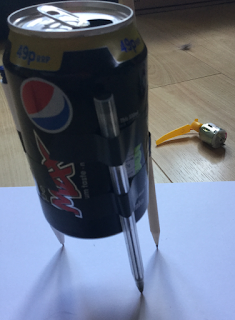
This post focuses on addressing some of the issues raised in the earlier post. The motors are now glued, via a glue gun, onto the plastic egg (figure 2) and four felt-tip pens are also glued on (see figure 1 above) so there is a firm connection to the egg. Setting the pens in the right positions is the trickest part of the process and you are probably best to experiment with tape / sticky tack before finally gluing them in place.
 |
| figure 2 |
 |
| figure 3 |
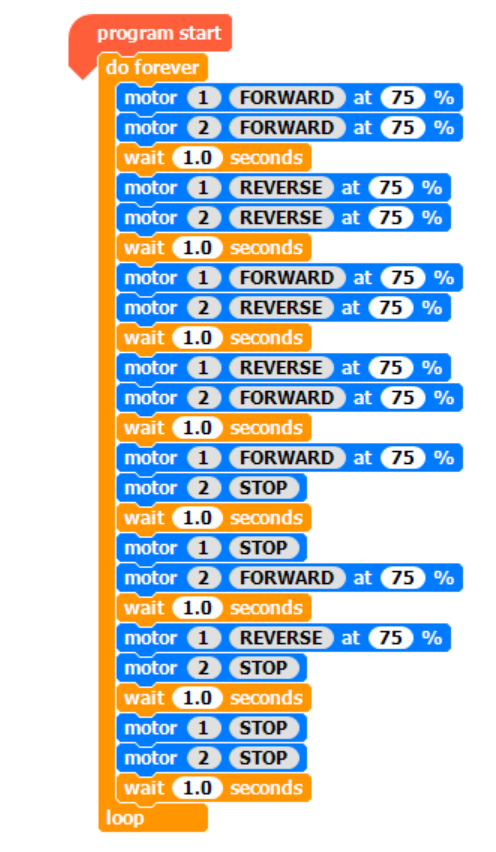
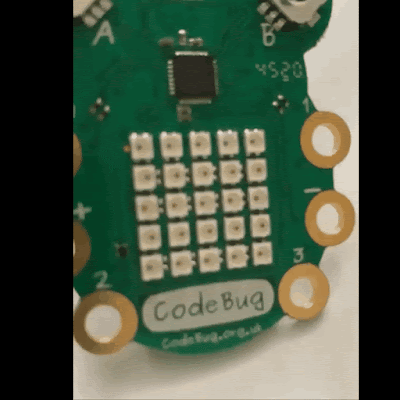
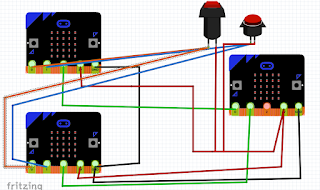
I like the Crumble for this task because it is designed to control two motors using a simple graphical programming language, without any extra hardware.
 |
| figure 4 |
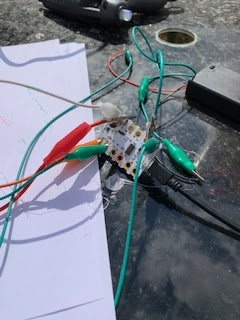
The program shown in figure 4 is trying out a lot of the possible combinations of direction for the motors. When the program is run it moves in (and draws squiggly lines) mostly, in arcs. There is still some work to be done on controlling it. It is sensitive to wires being touched, perhaps thinner wires connect the Crumble (figure 3) and the motors? The motors are perhaps not strong enough - though it does move, so perhaps stronger motors, upping the percentage power to the motors or upping the voltage (currently 4.5 to 6v and still within the capacities of the motors)?
It is good fun; there is a lot that can be experimented with, placement and direction of the motors just being one area.
All opinions in this blog are the Author's and should not in any way be seen as reflecting the views of any organisation the Author has any association with. Twitter @scottturneruon
 The Raspberry Pi Foundation recently released a programming activity Alien Language , with support Dale from Machine Learning for Kids
 I often play with the brilliant Sonic Pi https://sonic-pi.net/ for a bit of fun, but let's be clear I have no musical ability.
 Most read posts on the Robots and Physical computing Blog Popular posts from this blog Make yourself a virtual gallery
 The free online CAD (and so much more) package Tinkercad https://www.tinkercad.com/ under circuits; now has microbits as part of the list
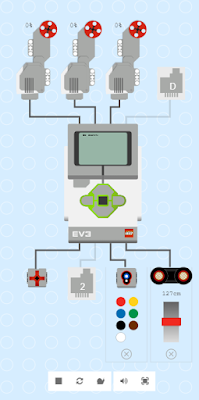
 You don't need to buy a robot to get programming a robot, now there are a range of free and relatively simple to start with robot simulation.
 Guest Blogger Hiren Mistry, Nuffield Research Placement Student working at the University of Northampton.
 I wanted to contol the CBiS micro:Bit Car via gestures whilst holding another micro:Bit
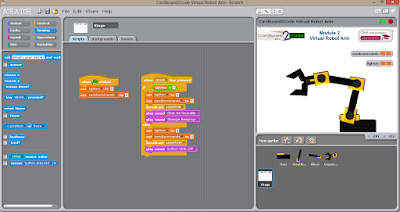
 It is not physical but CBiS Education have release a free robot arm simulator for Scratch.
 This is second in a two-post series on building a neural network using microbits with micropython.
 In previous posts ( post 1 , post 2 ) I have raved over the brilliant combination of Mozilla's AFrame and Jerome Etienne's fantastic AR.js


