Saturday 22 June 2019

Codey Rocky the new robot.

I recently tried out a new (well new to me) robot Codey Rocky - and yes I am going to tell people it's name is Rocky- for STEM outreach activities. I trialed it at recent Girls in STEAM event at the University of Northampton, UK and along with Red the Nao, it seemed to be positively received.


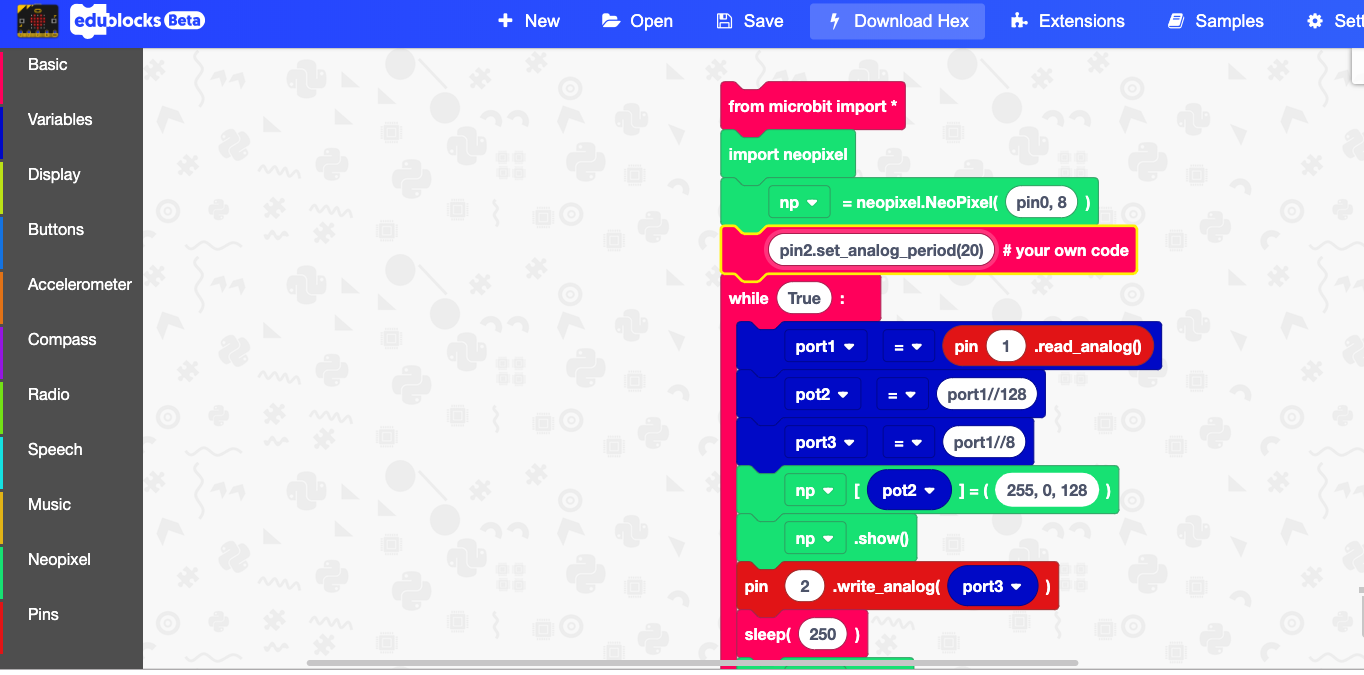
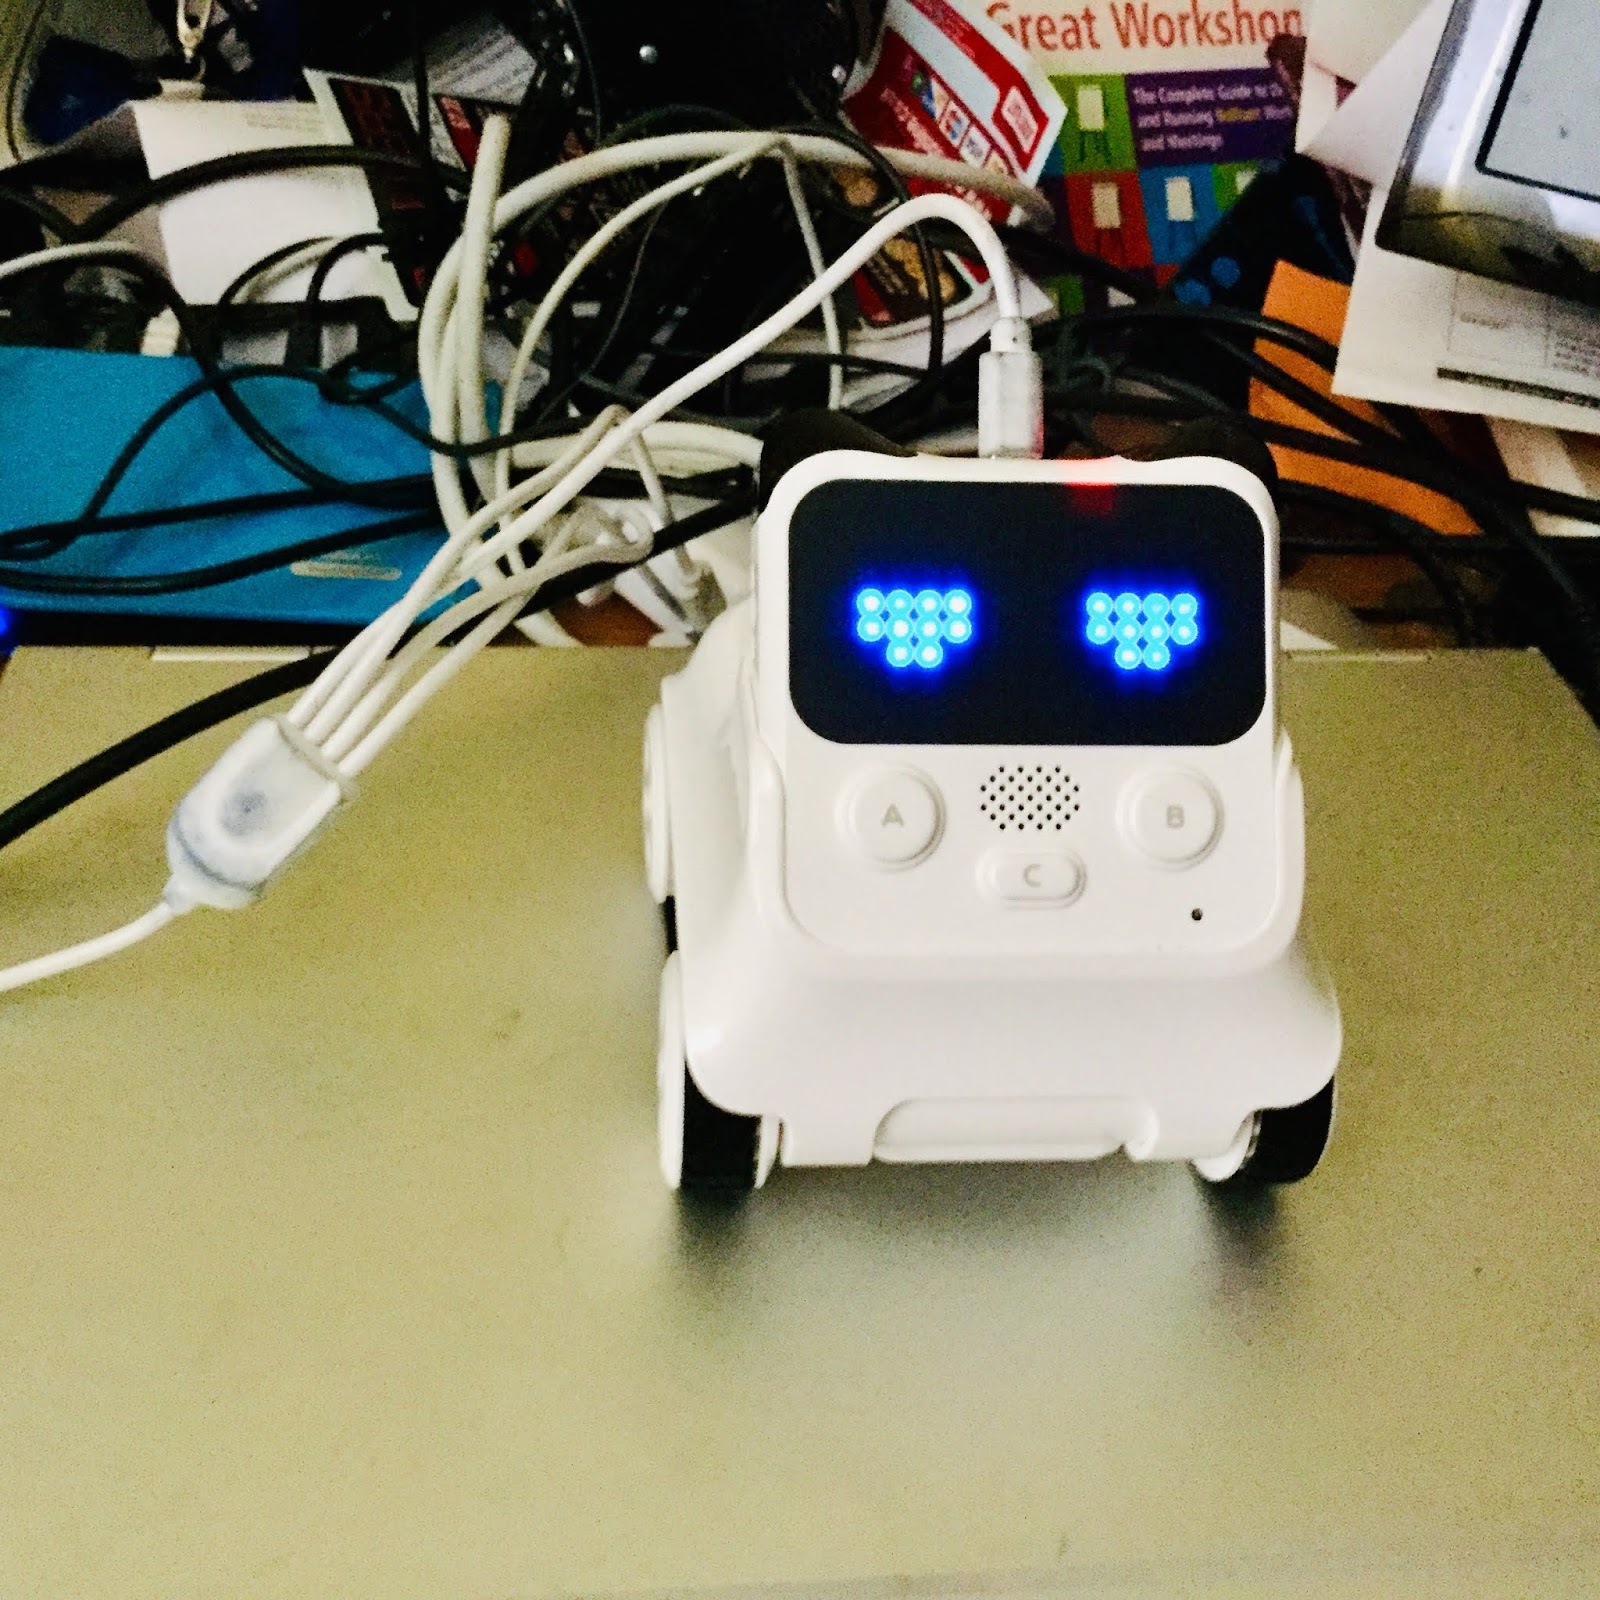
This is a slightly feline looking robot (it is the ears, though a bit hard to see in the image above) produced for the company MakeBlock. Programming it is most easily done through an app on a tablet (see below). It is very Scratch-like and the children seemed to pick up on that quite quickly and started producing their own code, the example below is one example they produced.


One group decided to set themselves the challenge of getting Rocky to travel along a line of them and they succeeded. Admittedly the challenge is not very hard, but the interesting point was they both decided as a group what to do and made it happen.

Rocky has many programmable features, moves around on its 'tank tracks' but also to program sounds, facial expressions and other features like controlling an LED just under the face. The face is a screen of controllable pixels.


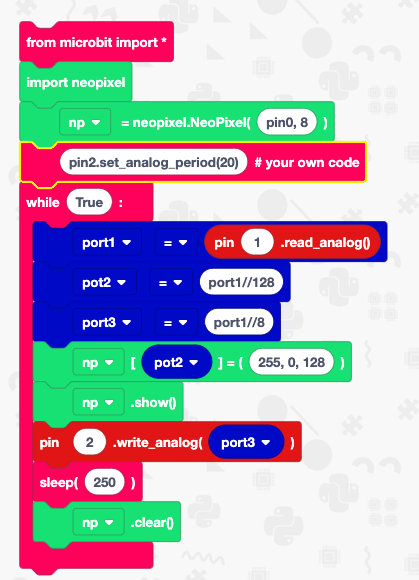
 The code above gets Rocky to put two wide eyes of the screen, play a sleepy sound, put two sleepy eyes on the screen and then make a humming sound when the A button is pressed.


There is more to explore, looking at the sensing blocks there are many thing to try out like


  • detecting shaking, 
  • measuring light level, 
  • reflected light level 
  • colour of the objects the robot is over - have played  a little with that one,
  • detecting tilting.

Lots to play with.


All opinions in this blog are the Author's and should not in any way be seen as reflecting the views of any organisation the Author has any association with. Twitter @scottturneruon

Saturday 1 June 2019

Robots and Physical Computing blog's 10 most popular posts in May 2019

Popular Posts


All opinions in this blog are the Author's and should not in any way be seen as reflecting the views of any organisation the Author has any association with. Twitter @scottturneruon

Monday 27 May 2019

New unicorn robot


For a few weeks I have had this kit - Smartibot - waiting to play with - finally got around to it. A cardboard-based, app-controlled, AI-enabled robot kit - now that is too tempting!


The kit comes with the parts for one of three models,  including a unicorn robot. A battery pack (takes 4xAA batteries not included), two motors, a bunch of nuts and bolts, 2 screwdrivers, 3 plastic balls, 2 wheel hubs, bunch of elastic bands and a very cute control board. The rest is cardboard including the wheels. The control board seems under-utilised for this task, even on a quick scan; on their kickstarter site, they show it controlling 4 DC motors and 10 servos. 


I was initially concerned it wouldn't have the rigidity needed; it does (even after being accidentally dropped down a flight of stairs) 

The app is free to download for both Apple (see below) and Android. The AI bit initially (certainly on IoS) comes from a cool routine that uses a phone's camera to move when it 'sees' a person.


It was a positive experience to build it; apart from adding batteries, everything was in the box or downloadable. The kit is available to pre-order at http://thecraftyrobot.net/wp/product/smartibot-basic-kit-preorder/

So the next stage is to program it. The company has released a blog post discussing a way to program it - something to try in the future. 


All opinions in this blog are the Author's and should not in any way be seen as reflecting the views of any organisation the Author has any association with. Twitter @scottturneruon

Monday 6 May 2019

Programming Anki's Vector robot

With the sad news that Anki is shutting down (https://www.vox.com/2019/4/29/18522966/anki-robot-cozmo-staff-layoffs-robotics-toys-boris-sofman) I thought it was time I start playing with the SDK for the Vector robot. In this short post, I providing a quick overview of getting going with this with a simple program based on the tutorials Anki provide.


Installation
I am using a Mac (more details are available here https://developer.anki.com/vector/docs/install-macos.html) but there are instructions for Windows and Linux.

- You need the Vector to have been set-up previous on a tablet, and an account set-up on the Anki Cloud.
- Install Homebrew - available here https://brew.sh/
- Using Homebrew to install Python3 brew install python3
-Now install the SDK python3 -m pip install --user anki_vector
- Lst but not least configure the set-up python3 -m anki_vector.configure - that is it. The configuration tool tells you where the serial number, etc is, so makes fairly a little easier.


First  Program
The tutorials have a number of useful Python examples. With them, as the basis the code below,  Vector moves off the charger and says "Hello Scott" - not earth-shattering but fun.


"""Hello World
Drive off the charger 
Make Vector say 'Hello Scott' in this simple Vector SDK example program.
"""

import anki_vector


def main():
    args = anki_vector.util.parse_command_args()
    with anki_vector.Robot(args.serial) as robot:
        robot.behavior.drive_off_charger()
        print("Say 'Hello Scott'...")
        robot.behavior.say_text("Hello Scott")


if __name__ == "__main__":

    main()


I am going to enjoy playing with this a bit more.


All opinions in this blog are the Author's and should not in any way be seen as reflecting the views of any organisation the Author has any association with. Twitter @scottturneruon

Friday 3 May 2019

Top 10 popular post on Robots and Physical Computing Blog - April 2019

Popular Posts

All opinions in this blog are the Author's and should not in any way be seen as reflecting the views of any organisation the Author has any association with. Twitter @scottturneruon

Tuesday 23 April 2019

Combining Beta Edublocks and Microbit Playground

I have recently been playing with Edublocks (edublocks.org) and the 4tronix's Microbit Playground (the appropriately named Super Kit) controlling programmable pixels/neopixels  and a servo.


Recently a beta version of the Edublocks (see above) has become available (https://app.edublocks.org/) so I wanted to play with it a bit and, at the same time, combine control the servo motor and neopixels together via a potentiometer (see below).


The block version of the code is shown below:


The python version
np = None
port1 = None
pot2 = None
port3 = None


from microbit import *
import neopixel
np = neopixel.NeoPixel(pin0, 8)
pin2.set_analog_period(20)# your own code
while True:
  port1 = pin1.read_analog()
  pot2 = port1//128
  port3 = port1//8
  np[pot2] = (255, 0, 128)
  np.show()
  pin2.write_analog(port3)
  sleep(250)
  np.clear()

To see it action


via GIPHY


A few thoughts on the beta version, I actually like it more than the current version for doing this kind of activity. I found it clearer to use,  it was easier to know what was needed to be done with blocks around the neopixels than the previous version, which needed a little more thought.


All opinions in this blog are the Author's and should not in any way be seen as reflecting the views of any organisation the Author has any association with. Twitter @scottturneruon

Tuesday 16 April 2019

microbit playground and Edublocks: Controlling the servo

Using the brilliant Edublocks specifically to microbit (https://microbit.edublocks.org/ ) I have been playing with a 4tronix Microbit playground. Previously I played with getting the turning a potentiometer to selected which neopixel light up, in this post the potentiometer is used to control the direction of the servo motor.

Below is the block code in Edublocks used to do this.


Set up use the Potentiometer attached to Pin1 to control the direction of a servo motor on pin2. 

The potentiometer output is turned into values between 0 (or 5 when I checked) and 1023; it is then divided, using the Floor operation (//, returns the integer part of a division), by 8 to decrease the sensitivity of turning the potentiometer. These values allow both clockwise and anticlockwise turning of the servo to based on the full range of the potentiometer. The line pin2.set_analog_period(20) was based on experimentation in a previous post.

The text-based version of the python code is shown below

np = None
pot1 = None
pot2 = None


from microbit import *
pin2.set_analog_period(20)
while True:
  pot1 = pin1.read_analog()
  pot2 = pot1//8
  pin2.write_analog(pot2)


All opinions in this blog are the Author's and should not in any way be seen as reflecting the views of any organisation the Author has any association with. Twitter @scottturneruon

Top posts on this blog in March 2024

The Top 10 viewed post on this blog in March 2024. Covering areas such as small robots, augmented reality, Scratch programming, robots. Micr...