
 For a few years, I have been a fan of Aframe and AR.js - these are fantastic tools for creating web-based Virtual and Augmented Reality.
 Elcrow in 2020 released on kickstarter and now in pre-order their own site , an interesting take on the Raspberry Pi laptop -
 The Raspberry Pi Foundation recently released a programming activity Alien Language , with support Dale from Machine Learning for Kids , tha...
 A product that has kept popping on to my radar has been the intriguing Turing Tumbles @TuringTumble
 In a previous post, I looked at developing a neural network in Tinkercad around the Microbit (details available here ) and the whole model ...
 In two recent posts, Makecode was used with the Enviro:bit from Pimoroni to try out a few ideas
 This is the second of a planned occasional series of posts on playing with some of the current AI specific add-on processors for Intenet of Things
 It is not physical but CBiS Education have release a free robot arm simulator for Scratch.
 Recently I produced a post about playing with Vex Robotics VexCode VR blocks and the Maze Playground.
Saturday 31 July 2021
This blog's Most read 10 posts July 2021

Wednesday 28 July 2021
Tumbling Turing 1 - initial play with the Turing Tumble @TuringTumble
A product that has kept popping on to my radar has been the intriguing Turing Tumbles @TuringTumble I admit to being initially hesitant (is just a gimmicky marble run? - it isn't!) a marble powered computer. The idea is using mechanical ideas to visualise computing concepts is thought-provoking and I have always loved marble runs and 'Heath Robinson'/'Rube Goldberg' style machines; so bit the bullet and brought one and I am impressed; it is great fun (more than just as a marble run).
Let's start with the packaging and components it is and feels like a high quality product. The components feel sturdy and well designed, the storage for the components also feels sturdy (see figure 1). The project book with the exercises etc is a mixture of puzzles and challenges, alongside a short graphic novel/comic; it all feels well executed and thought through. Online there is now a growing community https://community.turingtumble.com/ where new puzzels are posted, alongside new ideas for puzzles and support. Personally, I think this is a great move, and one of the features with the potential to move this from a game (I have no problem with games), into a tool (as well as a game) for experimentation and also an educational tool.
 |
| figure 1: components |
It does have elements of a marble run the power to everything is gravity acting on marbles (see figure 2).
 |
| figure 2: Game board |
In the video below the set of red and blue marbles, go through the system producing an output of alternating red and blue marbles - simple but good fun.
Where to next then:
- I am aiming to find the time to try out the binary operation puzzles and logic puzzles.
- then play with other ideas.
The company behind Turing Tumble have recently run a further very successful Kickstarter project for a follow-on idea Spintronics (see below) using mechanical concepts to help visualise and understand electronic concepts. Yes, I have 'pledged' for it along with several thousand others, it looks so Steampunk.
If you would like to play with a spintronic simulation goto https://www.turingtumble.com/upperstory/spintronics/simulator/index.html
Thursday 15 July 2021
CrowPi2 - Raspberry Pi laptop and much more.
Elecrow in 2020 released on kickstarter and now in pre-order their own site (or Amazon.com ) an interesting take on the Raspberry Pi laptop - a laptop with a built-in sensor lab.
e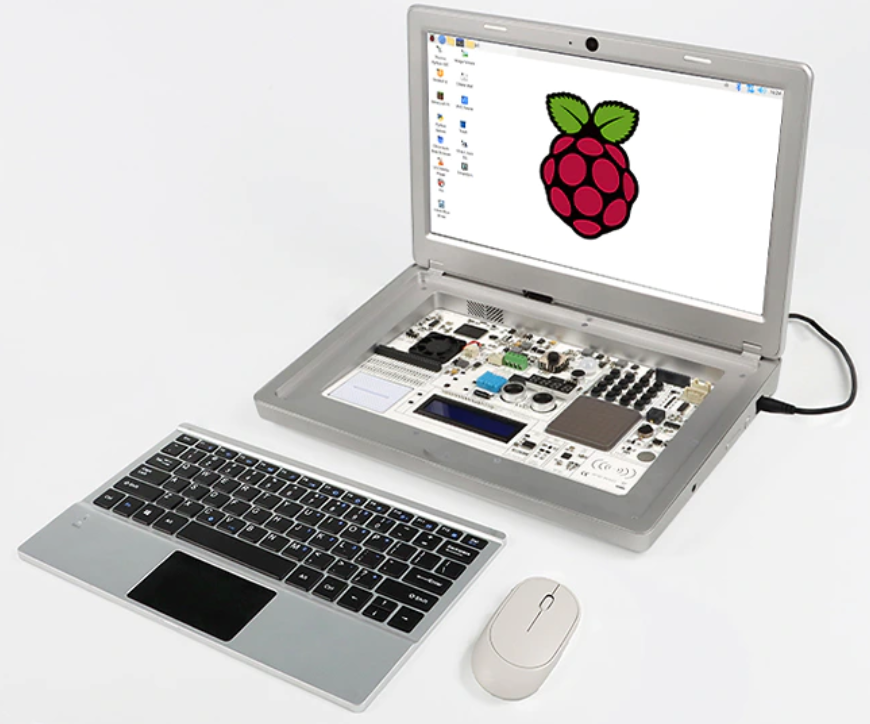 |
| Image taken from: https://www.kickstarter.com/projects/elecrow/crowpi2-steam-education-platformand-raspberry-pi-laptop/description |
The version I received comes with a fantastic range of items, including the Raspberry Pi; power bank; books on python and scratch; RFID keyfob; remote control; game controllers; and many other components. A wide range of software and learning materials are installed on the SD-Card; including software to learn about AI.
All opinions in this blog are the Author's and should not in any way be seen as reflecting the views of any organisation the Author has any association with. Twitter @scottturneruon
At the moment I have mainly been playing with it as a Pi based laptop but I am looking forward to digging into playing with the sensors.
To find out more go to https://www.elecrow.com/crowpi2-raspberry-pi-portable-laptop.html
Monday 5 July 2021
Added to the National Teaching Repository - Free Augmented Reality
The National Teaching Repository https://ntrepository.wordpress.com/home/ based at Edge Hill University was set up to provide a resource for sharing teaching resources.
Members of Canterbury Christ Church University play a role in the curation process.
To search the Repository https://figshare.edgehill.ac.uk/The_National_Teaching_Repository
All opinions in this blog are the Author's and should not in any way be seen as reflecting the views of any organisation the Author has any association with. Twitter @scottturneruon
Thursday 1 July 2021
June 2021 - 10 Most viewed Blog posts on Robots and Physical computing Blog
- / The ever-brilliant 4tronix have produced Eggbit https://shop.4tronix.co.uk/collections/microbit-accessories/products/eggbit; a cute, wear...
 Finally got to play with something that has been my list of things to play with, the Pimoroni Enviro:bit Weather Kit https://learn.pimoroni...
- The Raspberry Pi Foundation recently released a programming activity Alien Language , with support Dale from Machine Learning for Kids , tha...
 In a previous post, the Envirobit ( https://shop.pimoroni.com/products/enviro-bit ) for the Microbit was played with getting temperature,...
- In two recent posts, Makecode was used with the Enviro:bit from Pimoroni to try out a few ideas ( https://robotsandphysicalcomputing.blogspo...
- Speech Recognition in Scratch 3 - turning Hello into Bonjour! The Raspberry Pi Foundation recently released a programming activity Alien Lan...
 Guest Blogger Hiren Mistry, Nuffield Research Placement Student working at the University of Northampton. How to use a PS3 Controller to...
- It is not physical but CBiS Education have release a free robot arm simulator for Scratch. Downloadable from their site http://w...
 This post forms part of occasional posts about playing with Marty the Robot V2 ( https://shop.robotical.io/products/marty-the-robot-v2 ) fr...
 I am going to try to persuade you that using A-Frame it is not hard to do some simple Augmented Reality (AR) for free, via a browser, but th...
Tuesday 29 June 2021
Microbit and Environment Measurement - Using Python
In two recent posts, Makecode was used with the Enviro:bit from Pimoroni to try out a few ideas (https://robotsandphysicalcomputing.blogspot.com/2021/06/pimoroni-envirobit.html and https://robotsandphysicalcomputing.blogspot.com/2021/06/pimoroni-envirobit-light-and-led.html ). In this post Pyton using the Mu editor was used to try out the Enviro:bit.

As in the makeCode version, Pimoroni has provided both a python library (via Github) but also within the Readme.md useful installation instructions. There is at the time of writing a possible typo; to get the BME280 sensor (temperature, pressure, humidity sensor) to work; you need to add parenthesis in the line bme = bme280.bme280()
After that, it works fine and includes potential altitude measurement which I don't think is in the Makecode version (though I could be wrong); I need to play with it a bit more.
To experiment the code below was used test reading temperature (in Centigrade), humidity (%), and altitude (feet). In the examples, currently provided with the library, I couldn't find a BME280 example but it was fairly easy to adapt the examples included to get something going.
import microbit
import bme280
bme = bme280.bme280()
while True:
reading = bme.temperature()
microbit.display.scroll("temp: ")
microbit.display.scroll(str(reading))
microbit.sleep(3000)
reading = bme.humidity()
microbit.display.scroll("humidity: ")
microbit.display.scroll(str(reading))
microbit.sleep(3000)
reading = bme.altitude()
microbit.display.scroll("Alt: ")
microbit.display.scroll(str(reading))
microbit.sleep(3000)
It is a cool and fun device to play with, though I not sure the precision of the readings shown on the microbit LEDs is really necessary :-)
Monday 28 June 2021
Pimoroni Envirobit - Light and LED
In a previous post, the Envirobit ( https://shop.pimoroni.com/products/enviro-bit ) for the Microbit was played with getting temperature, humidity and pressure (https://robotsandphysicalcomputing.blogspot.com/2021/06/pimoroni-envirobit.html).
In this short post a quick experiment using the sound and light sensor, to turn LEDs on the board to turn off and on beyond on light level. The code is set up when a clap happens nearby, light level is used to 'decide' whether the LEDs are turned on or off, below a threshols the LEDs go on above it the LEDs are turned off,
 |
| Makeecode |
Using Makecode makes this relatively easy to implement and fun.
Subscribe to:
Posts (Atom)
Top posts on this blog in March 2024
The Top 10 viewed post on this blog in March 2024. Covering areas such as small robots, augmented reality, Scratch programming, robots. Micr...
