Tuesday 30 June 2020

10 most read posts (June 2020) on Robots and Physical Computing Blog

Popular Posts


All opinions in this blog are the Author's and should not in any way be seen as reflecting the views of any organisation the Author has any association with. Twitter @scottturneruon

Friday 26 June 2020

Easy, Free and no markers Augmented Reality - location based AR

For a few years, I have been a fan of Aframe and AR.js - these are fantastic tools for creating web-based Virtual and Augmented Reality. 

Now AR.js has just got easier - no coding need with the Beta version of AR.js Studio  including using markers (see this previous post for more details) and the focus of this post, geo-located or markerless AR.

It so easy I am going to show two examples. First going to the start screen of AR.js Studio https://ar-js-org.github.io/studio, select location based project type.


You will then be asked for the longitude and latitude on where you want your AR to be located, up to 10 locations can be used - I have only used one to trial it. If you don't know these co-ordinates they have included a link to a site https://www.latlong.net/ (see below) that will give you these and you can then transfer them into AR.js Studio that is the geo location bit done. Now for the thing at the location.


So for the first experiment, I going to use a free 3D model from https://sketchfab.com/3d-models/duck-6e039c6c606c4c26a1359514352629fd produced by likangning93 and released under a creative commons licence on Sketchfab. It is as simple as clicking upload file and browsing. The last stage is publishing it on GitHub and you getting a URL or downloading the files and which you can later add to a server - both really just a click option. 

So the Duck is shown below


So as a follow up and as I think Jupiter is such as a beautiful planet, I used a model by Miekle Roth on Sketchfab https://sketchfab.com/3d-models/jupiter-c5275eb96af245e4a8453837ac728a62 as a second geolocated object. So now I have Jupiter whenever I want - no I am not that power-mad.


Some interesting things I noticed it is relatively easy to do it, and I think the resources downloaded through AR.js Studio could be a great start on a more complex project. Initially, I didn't have location turned on my phone (obvious I know) but I could still see the object when I looked down - so that is great feature to have when you are trying out markerless AR to see what it could look like. 


All opinions in this blog are the Author's and should not in any way be seen as reflecting the views of any organisation the Author has any association with. Twitter @scottturneruon

Friday 19 June 2020

Easy, Free and Quick Augmented Reality (AR) - AR.js Studio - Marker based

For a few years, I have been a fan of Aframe and AR.js - these are fantastic tools for creating web-based Virtual and Augmented Reality. 

Now AR.js has just got easier - no coding need with the Beta version of AR.js Studio https://ar-js-org.github.io/studio/


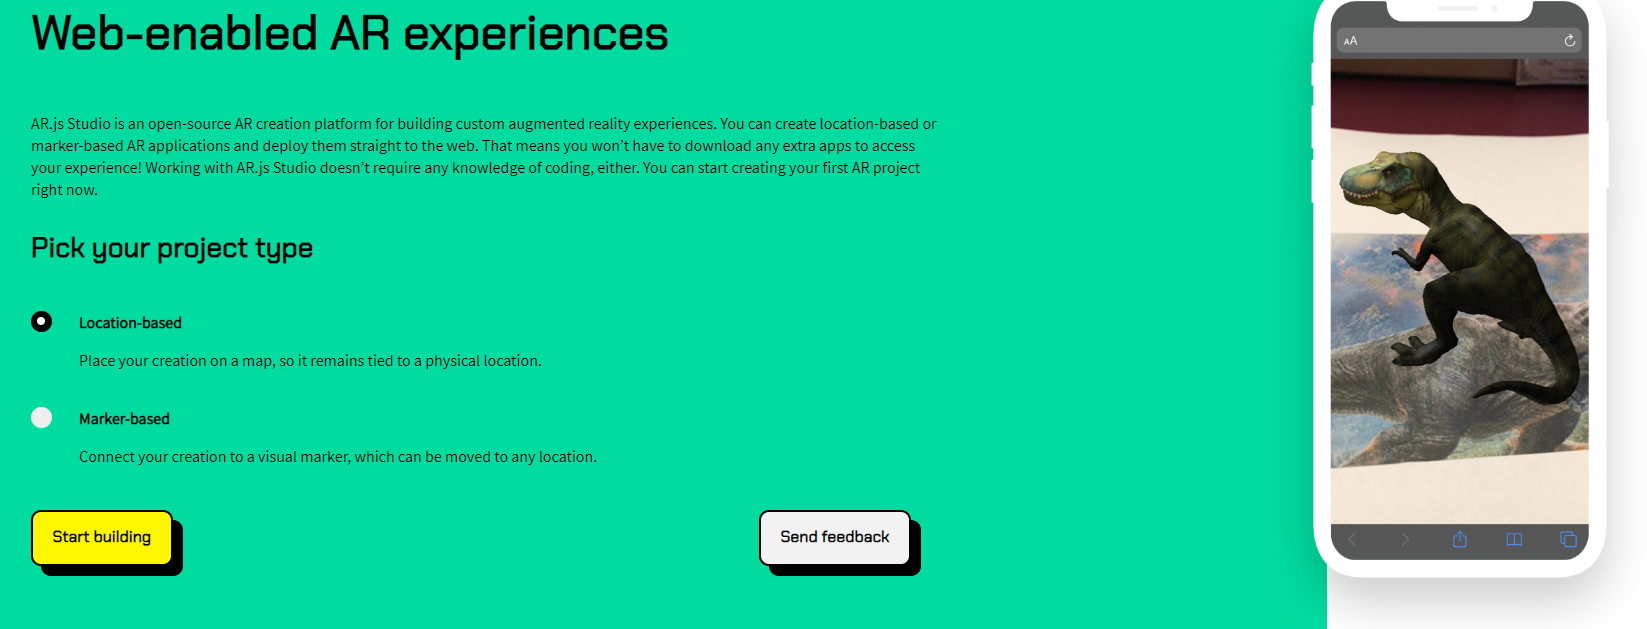
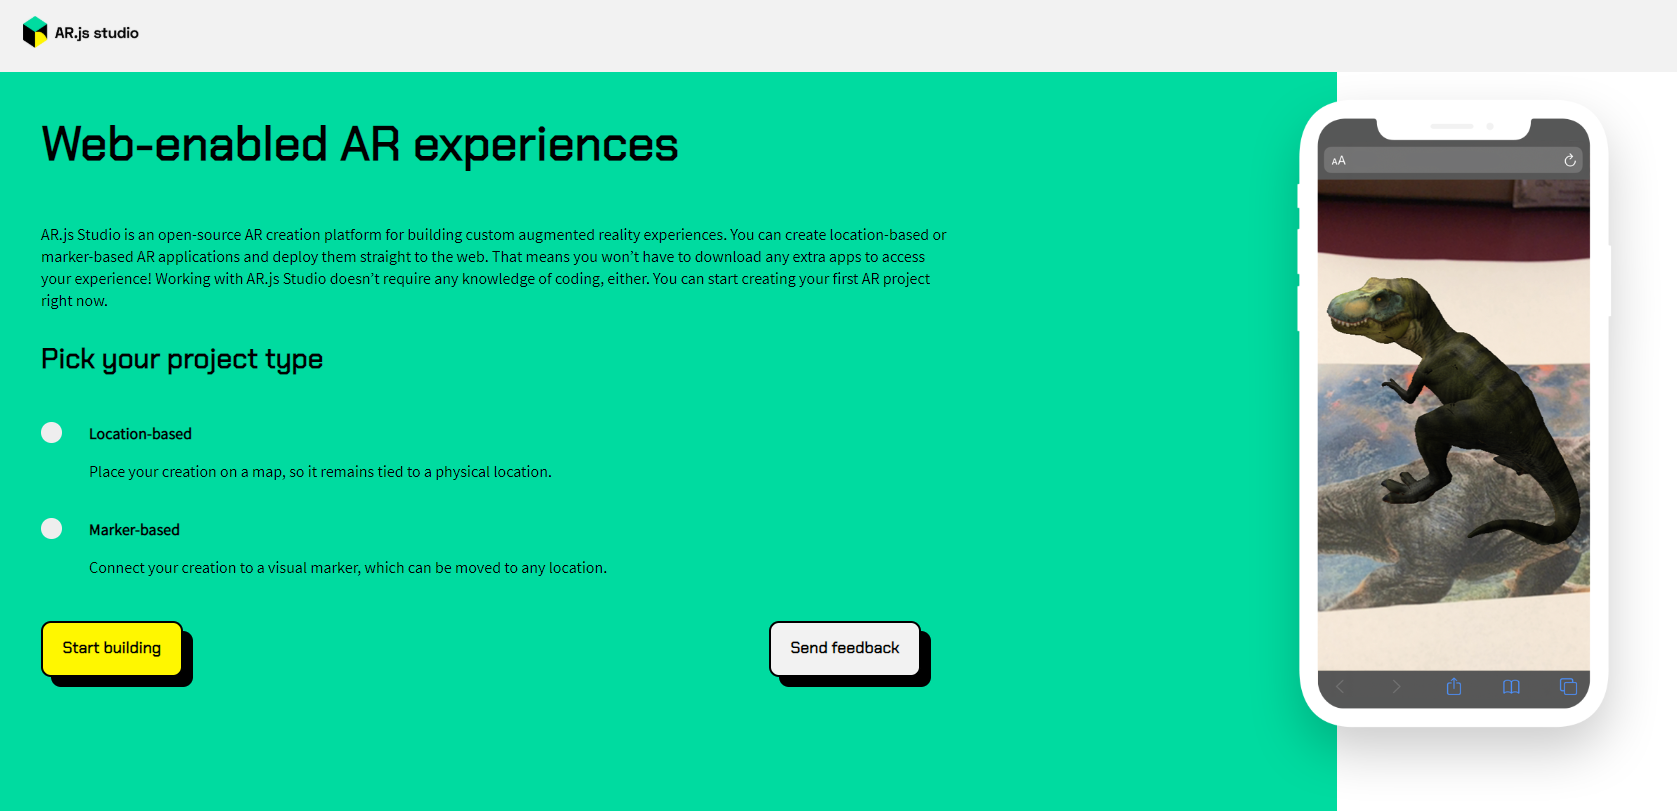
The start screen above gives you the option of location-based or Marker-based projects, I am selecting marker-based and then pressed Start building.

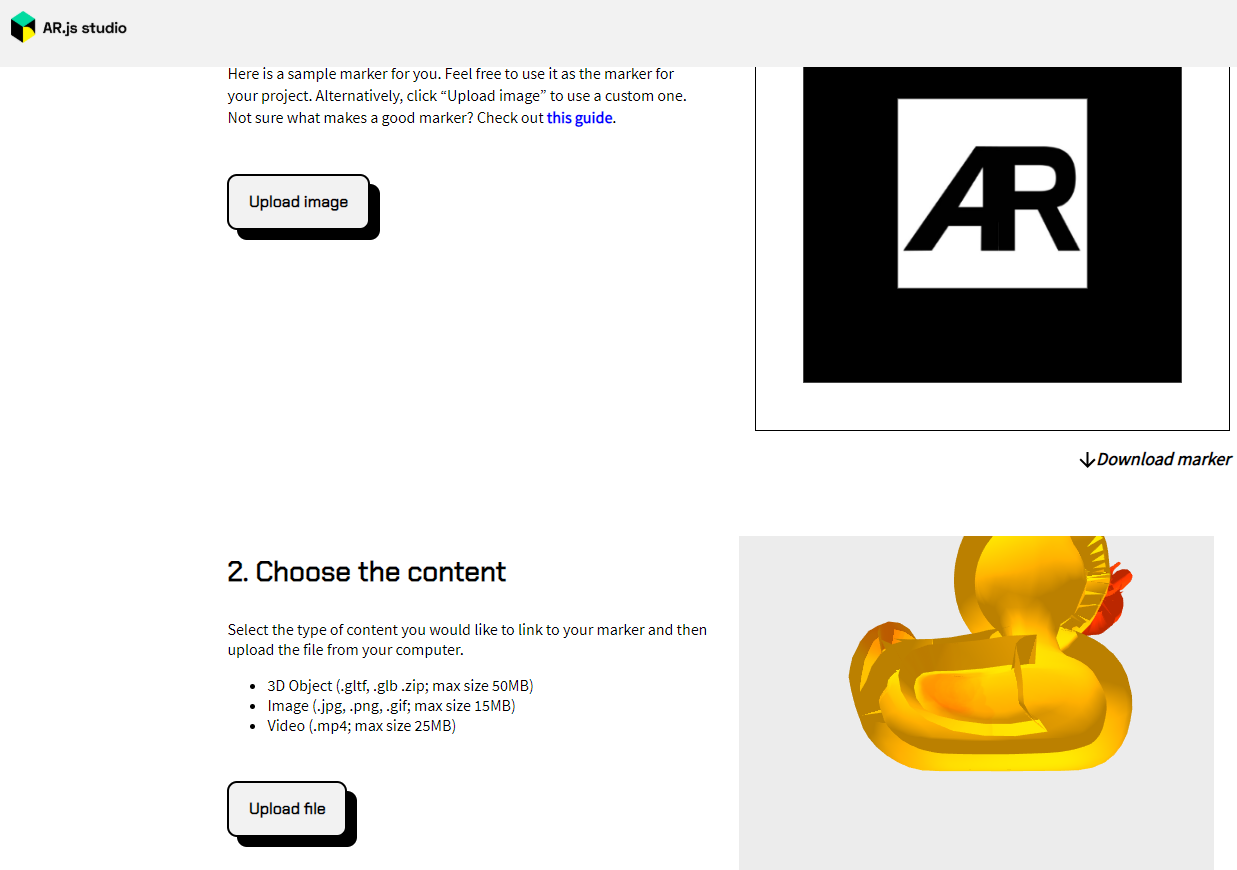
I am going to use the premade marker but you can upload your own )there is a guide to what makes a good marker). The premade marker you can download from the site using the download marker link underneath the marker. Apart from that, you don't have to do anything else to select the marker.

Now you choose whether you want 3D object, image or video. So for this experiment, I going to use a free 3D model from https://sketchfab.com/3d-models/duck-6e039c6c606c4c26a1359514352629fd produced by likangning93 and released under a creative commons licence on Sketchfab. It is as simple as clicking upload file and browsing.


Last stage is exporting the project. Two options 
- Published to Github 
- Download package

My advice is, if you don't have your own web-server, get yourself a Github account and choose that option, and you just log-in to your account. You will need to give the project a name and then push Publish. Depending on your internet connection it can take a few seconds to a minute or so, but it is worth the wait.

So now you get back a URL https://scottturneruon.github.io/Testobjectexs5y2/ . Now just show the marker.


So to test I am typing this URL in a Safari browser (Chrome can play up) on my phone and allow access to my camera (see below or try it for yourself which is more fun).


This Beta version is very good, no coding needed by the user and easy steps to an AR.  At the time of writing the only slight issue was you need to ensure that the file extensions were not capitalised but other than it is a great tool for produce a single AR example. I need to try the location-based version next.


All opinions in this blog are the Author's and should not in any way be seen as reflecting the views of any organisation the Author has any association with. Twitter @scottturneruon

Monday 1 June 2020

10 most viewed post on Robots and Physical Computing: May 2020

Popular Posts


All opinions in this blog are the Author's and should not in any way be seen as reflecting the views of any organisation the Author has any association with. Twitter @scottturneruon

Saturday 2 May 2020

Programming Robots Virtually 3: LEGO EV3


In this series of posts, I am going to look at experimenting with a few tools that allow robots to be simulated, programmed, these are ideally web-based, free and simple to use. In this post,the focus is on one that has been around for a while Makecode for the LEGO Mindstorms EV3 robotics kit available at https://makecode.mindstorms.com/#editor another example of the flexible MakeCode format. A very useful guide to using this coding tool is available at https://makecode.com/blog/lego/05-15-2018


This time it does not give you a built robot but a programmable simulation of the Brick, all the sensors and motors; which it automatically connects together depending on the code (see above). I like this idea it means it is flexible, as well as encouraging thinking about the design and operations of the programs before trying it out physically.


So to experiment with it.  I played with a number of elements:


When touch sensor is pressed (looks like a box with a cross on it) drive one of the motors forward, when that sensor is released the motor reverses.  Following this I added the ultrasonic sensor (the one that looks like two eyes); when an object is near (controlled in the simulator by moving the slider upwards), the motors B and C rotate 5 times. The code is relatively easy and can be seen below.


Now to play with the brick itself. The first operation, is when it starts add a 'mood' set of wide-open eyes in this case, on the Bricks screen, when the enter button [the central button on the brick], show a happy face on the screen, wait and add a purring sound and write Be Happy on screen. Lastly when Red (a set of pressable colours appears near the sensor) is detected using the colour sensor put an expression on screen and when blue detected put a closed-eyed expression on screen (the code is shown below and all the code at 
https://makecode.com/_016aUf2YtDx6 might need to change it to blocks by changing a tab at the top of the screen)


Opinion.

I like Makecode anyway, but I think this is another good use of it. There is no installation needed to run the code and simulator and no LEGO has to be bought. If you have a Mindstorms EV3 kit, you can download your code to a physical EV3 robot (or whatever you have built using EV3). I would love to see in the comments what people have done with it as well.

Play with it yourself below:


The code used is available at https://makecode.com/_016aUf2YtDx6 


All opinions in this blog are the Author's and should not in any way be seen as reflecting the views of any organisation the Author has any association with. Twitter @scottturneruon

Thursday 30 April 2020

10 most views post on Robots and Physical Computing Blog- April 2020


All opinions in this blog are the Author's and should not in any way be seen as reflecting the views of any organisation the Author has any association with. Twitter @scottturneruon

Sunday 26 April 2020

Programming Robots Virtually 2: iRobot Simulator

In this series of posts, I am going to look at experimenting with a few tools that allow robots to be simulated, programmed, ideally web-based, free and simple to use. In this post, I am looking at iRobots recently released free tool that can be used on computers, tablets and phone to program a simulated iRobot Root robot targetted at educational use.


The initial inspiration for looking at this was through an IEEE Spectrum online article; the tool is web-based app and can be found at https://code.irobot.com/#/ 


In my opinion, it's most interesting feature is the same code can be written in three different ways. The codes below were the same thing (touch the left sensor turns and draws left, similarly for the right sensor; and lastly when front bump sensor touched it moves forward and plays a C) on all three levels. You only need to write it in one and it is usually available in all three levels, potentially good for transitioning between levels of challenge?


Level 1 is based around connecting icons together, aimed at young children


 Level 2 is a graphical, drag and drop blocks programming language in the same vein as Scratch and makecode   


Level 3 is a more traditional text-based programming language currently it is Swift; their website suggest other programming languages may be coming soon.


Resources
Learning library https://edu.irobot.com/learning-library is available but you need a code to access some of the resources.


My view so far
If you want a tool to use with very small children using Level 1, through more flexibility using Level 2 to text-based using Level 3. Nice, as the same tool can be used at different levels. It does simulate a real robot iRobot Root coding robot see https://www.irobot.co.uk/root for more details.


This might be of interest


All opinions in this blog are the Author's and should not in any way be seen as reflecting the views of any organisation the Author has any association with. Twitter @scottturneruon

Top posts on this blog in March 2024

The Top 10 viewed post on this blog in March 2024. Covering areas such as small robots, augmented reality, Scratch programming, robots. Micr...